Spreading virtual life everywhere
By JC on Wednesday 4 August 2021, 17:42 - Programming - Permalink
Few weeks ago, I found my old Tamagotchi P1 in some old stuff I had, and I wondered if somehow someone hacked it. After some research, I found out that the ROM has been successfully extracted from the picture of a die, and that it could be run on some MAME emulator. But I really wanted to play around with the ROM, and wondered if it would be possible to run it on an embedded system, like a Smartwatch or an STM32 MCU based board.
So to satisfy my curiosity I decided to develop my own Tamagotchi P1 emulator !
What's inside a Tamagotchi
The original Tamagotchi, also referred to as P1, was released in 1996 by Bandai, and featured:
- an E0C6S46 Epson MCU that runs at 32,768 kHz
- a B/W LCD made of 32x16 pixels and 8 separate icons
- three user buttons
- a reset button
- a piezoelectric speaker
Luckily, the technical manual for the E0C6S46 MCU was available online directly from Epson's website, and was basically all I needed to start writing an emulator...
Desktop emulation
I decided to begin with a desktop application, developed from scratch specifically for the Tamagotchi, with portability in mind. To be more specific, I divided it in two parts:
- TamaLIB is a self-contained hardware/OS agnostic Tamagotchi P1 emulation library. It handles everything related to the actual emulation (CPU and board), relying on a user defined abstraction layer (HAL) for hardware/OS related operations like graphics, audio, clock, and so on.
- TamaTool is a cross-platform frontend for TamaLIB, while also being a HAL implementation example. It is an exploration tool featuring a realtime RAM editor, an ASM debugger and an I/Os monitor, allowing to play around with the Tamagotchi P1 ROM.
As usual, you can find both projects, along with the instructions to build and use them, on GitHub:
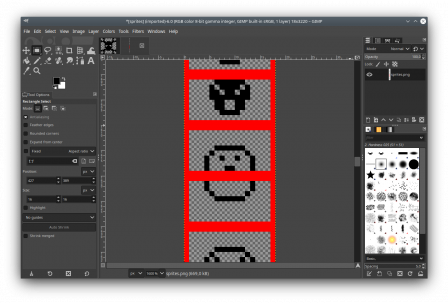
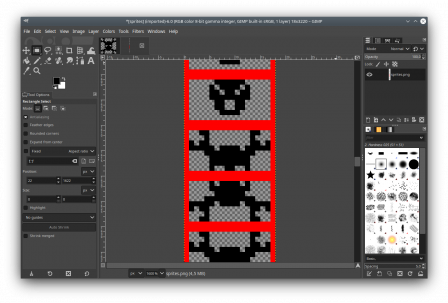
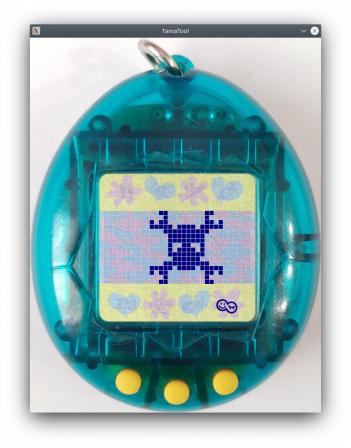
As a bonus, TamaTool also allows to extract data (mainly sprites) from the ROM in the form of a PNG file, that can then be modified using an image manipulation tool like GIMP, and finally imported back into the ROM. This basically allows to create custom Tamagotchis and eggs, as shown in the example below:
TamaTool supports Linux, Windows (with some limitations) and MacOS. Binary releases are provided here.
Android support is planned, but a dedicated application without libSDL2 will probably be more efficient.
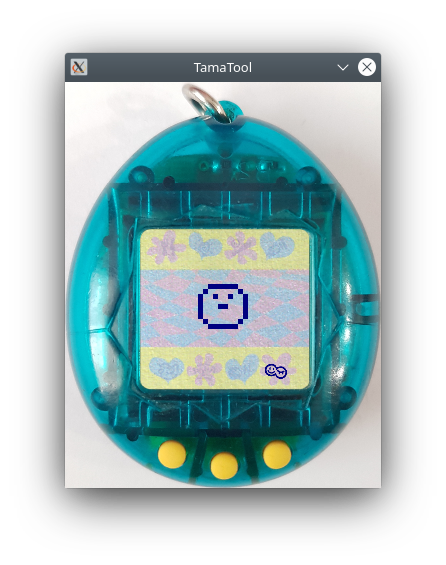
For those who wonder, the shell is a picture of a my own P1, and the background image is actually a high-res scan of its background that I filtered and enhanced using GIMP to make it look more even:
A note regarding timing accuracy
While I was developing TamaTool and TamaLIB, I noticed that three factors were involved in the emulation speed of the ROM:
- the duration of CPU instructions
- a 1 Hz timer
- a 256 Hz timer
My goal being that the emulation speed perceived by the user matched the one of a real Tamagotchi, I experimented with those factors to find the right constraints, while knowing the less flexible solution that would do the job would be a cycle-accurate emulation. I found out that the CPU speed was mainly responsible for the speed of the animations and UI, the 1 Hz timer for measuring the passing of time, and the 256 Hz timer for user input polling and sound output.
The 1 Hz and 256 Hz timers can be easily emulated since they require an accuracy of 1 s and around 4 ms respectively. However, a real Tamagotchi runs at 32,768 kHz and a real CPU instruction takes between 5 and 12 cycles to be executed, meaning that the instruction should take between 153 and 366 us to be accurate, which is pretty low and requires a high-resolution clock available on the platform running the emulator. These timings were achievable on a desktop computer, but would be harder to match on embedded systems, especially when other stuff, like updating the screen, could delay the emulation. That being said, the animations and UI transitions do not visually appear to have timings that require such a high granularity. That means the perceived speed should feel real as long as the total elapsed time was correct, with respect to the consumed CPU cycles, even if it was not at the instruction level.
I experimented with several implementations, but found out that the best approach was to:
- keep an internal tick counter storing exactly how much CPU cycles have passed
- implement the various timers using that counter as reference
- make sure the total elapsed time since the beginning of the emulation matched that counter as closely as possible by waiting (if needed) after each executed instruction the necessary amount of time
This solution had the advantage of allowing the emulation flow to be flexible while accurate, slowing down by itself if it was too fast at some point, or speeding up to catch up if it was too slow. After some tests, I found out that an accurate clock with a resolution of 1 ms was enough to have a "realtime" experience.
So I had a robust emulation, but what about the initial goal of running the Tamagotchi code on an embedded system ?
MCUGotchi
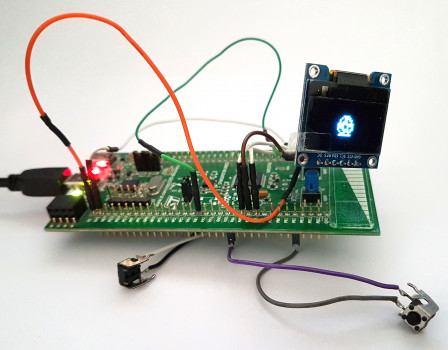
I had a STM32F072 discovery board laying around, so I just needed a cheap SSD1306 OLED screen and two buttons (the board already has one) to make the perfect setup to test an embedded implementation of TamaLIB. Few lines of code later, MCUGotchi was born !
Right now, MCUGotchi does not have sound support, but everything else works as expected, exactly like a real Tamagotchi P1 would. The board runs at 48 MHz, which is more than enough for a full speed CPU emulation. The systick feeding TamaLIB has a granularity of 100 us, and refreshing the OLED screen does take some time, but thanks to the allowed flexibility explained above, nothing can be perceived by the user. The OLED screen has a resolution of 128x64 pixels, so I had to make some 8x8 icons from scratch for the various actions provided to the user, while the pixels of the original dot matrix are represented by 3x3 squares.
Here is a quick video showing MCUGotchi running on the board:
MCUGotchi aims at being an implementation example of TamaLIB's abstraction layer running on various microcontrollers, so the build system has been written in a way that allows support for other boards in the future. Regarding the code, it is clearly STM32F0 oriented, but it uses the latest version of the STM32Cube library for STM32F0, whose calls are theoretically compatible with other STM32Cube libraries. This means that the code should already run on other STM32 MCUs with minor adjustments.
Like TamaLIB and TamaTool, MCUGotchi is open-source and available on GitHub there, where you will also find more information regarding how to build it, and how to reproduce my setup.
Final words
The end goal of this project is to allow anyone to run the Tamagotchi P1 code anywhere, while providing a tool to experiment with the Tamagotchi ROM. If time allows, I also plan to release an open-source board and casing specifically designed to run an MCUGotchi based firmware, mainly to be able to run custom ROMs on the go.
Right now, the project only supports the Tamagotchi P1 ROM, as there is no P2 ROM around. But I would really appreciate if someone could manage to dump the ROM of a P2 since I guess the boards are probably the same.
Again, all projects can be found on GitHub:
Feel free to check them out !
