Adding a fan to a Sanguinololu v1.3b
By JC on Sunday 14 September 2014, 14:24 - 3D Printing - Permalink
Few months ago, I completed the build of my RepRap Prusa i3, and decided in the process to add a fan to it.
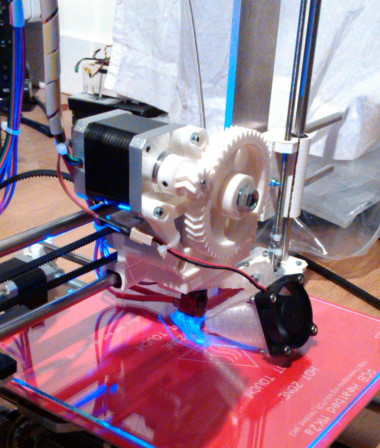
There are several parts that can benefit from a fan, but since I'm exclusively printing PLA, I was mainly interested in cooling down the print itself. I easily found some nice fan mounts on Thingiverse, but I had some difficulties to find the fan connector of my Sanguinololu 1.3b. And for good reasons, since there is none. Well, not dedicated to a fan at least.
A 5V to 12V PWM converter
Here is a list of what I used to add a regular 12V PC chipset fan to you my Sanguinololu v1.3b (should work on v1.2 or superior) :
- A 2-pin 40mm 12V fan (3-pin should work too using the 12V and GND pins only)
- An IRLMS2002 SMD MOSFET
- A 10 kOhm SMD resistor
- An SMD Schottky diode
- Three 2-pin connectors (one for the FAN, two for the Sanguinololu)
- A piece of heat-shrink tube
- Some wire
- Some Kapton
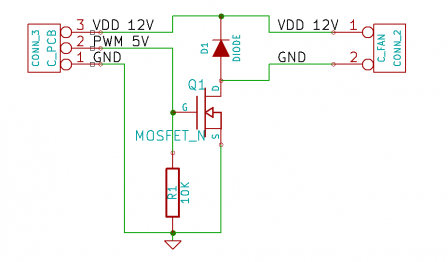
The idea was to use the 5V PWM pin from the Sanguinololu to pilot the 12V fan. In order to do so, I used a simple MOSFET and a 10 kOhm pull-down resistor. I also added a flyback diode to the fan that the MOSFET is controlling. Of course, if you have a 5V fan, you just need the flyback diode.
In order to have a nice connector for the fan and no piece of PCB hanging, I tried to fit everything inside the heat-shrink tube.
The schematic of the converter :
Building it
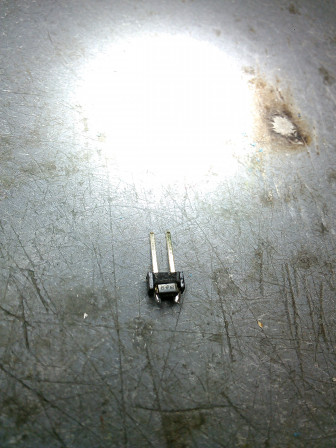
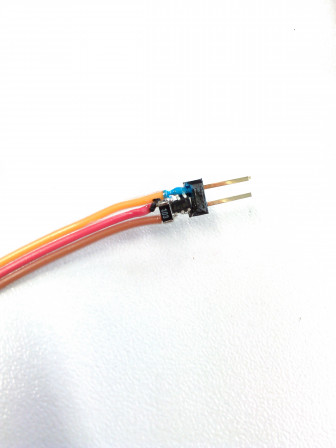
I first soldered the diode directly on the 2-pin connector.
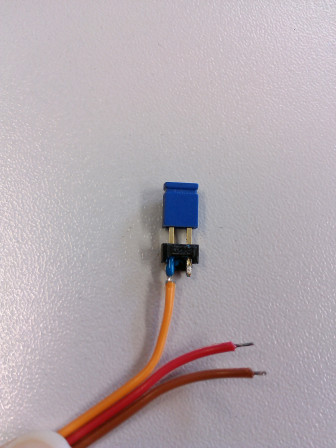
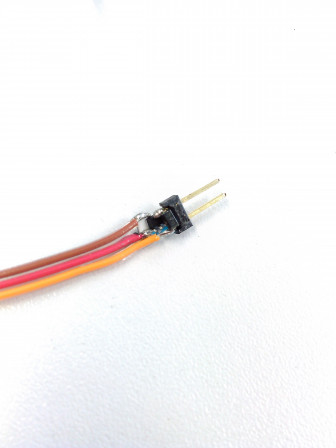
Then I soldered two of the MOSFET Drain pins on the 2-pin connector GND pin (on the other side of the connector this time). The blue paste was some nail polish I put to isolate the 12V pin, but it did not work as expected since the heat was melting the nail polish... Eventually, I had to use some Kapton instead, but this is not shown in the pictures.
The last component needed was the pull-down resistor I soldered between the Gate and Source pins.
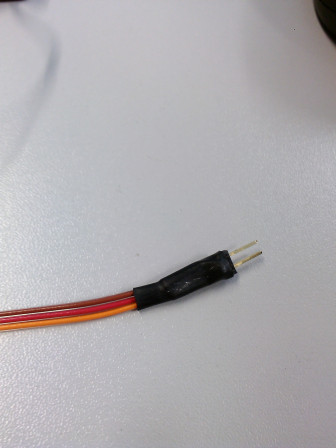
Here is the final result with the protecting heat-shrink tube :
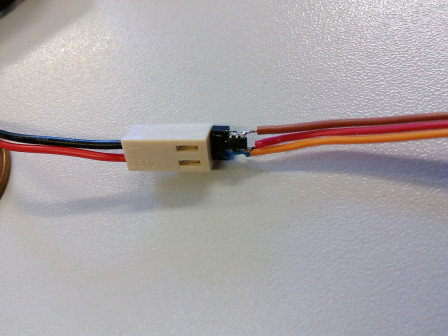
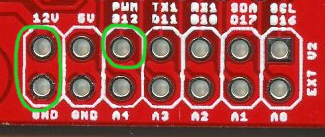
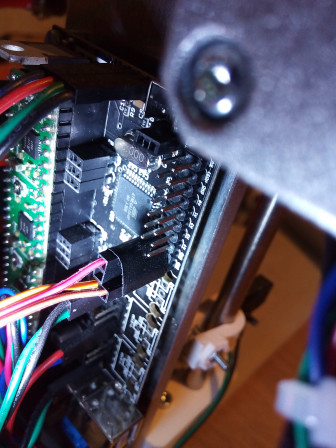
To connect it to the Sanguinololu, I used two 2-pin connectors : one for the 12V and GND pins, and one for the D12 5V PWM pin (leaving one hole of the connector empty).
It had be connected as follows :
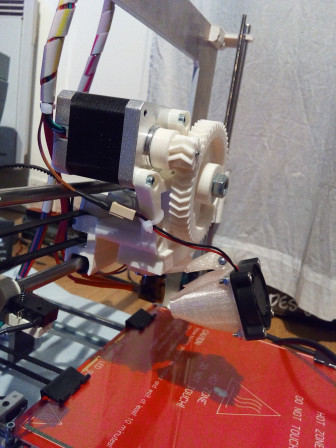
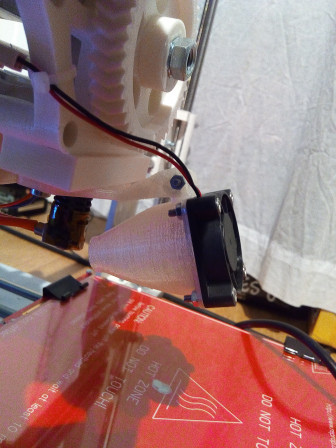
I then printed these nice fan mount and duct from Thingiverse, and mounted everything in place.
Final touch
From a software point of view, the fan needed to be enabled with the proper pin in the Sanguinololu firmware. I'm using Sprinter as firmware, so I had to edit Sprinter/pins.h, and replace
#define FAN_PIN -1
by
#define FAN_PIN 4 // D12 PWM pin
in the Sanguinololu pin assignment (MOTHERBOARD == 62).
Once the firmware rebuilt and flashed, I had a working fan mounted on my Prusa i3 !
Comments
Awesome! Can it print the stanford bunny ?